How to Enable Premium Threat Protection
Premium threat protection stands as a critical defense mechanism against a multitude of risks.
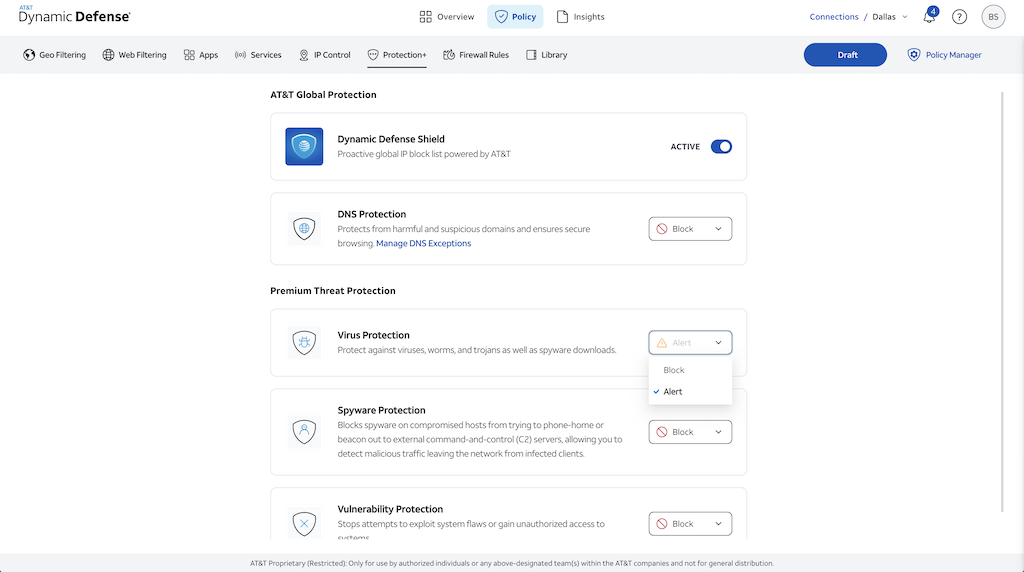
- Virus Protection is crucial to detect and eliminate malicious software that can harm systems or steal data.
- Spyware Protection guards against covertly installed programs that gather sensitive information without consent.
- Vulnerability Protection helps identify weaknesses in software systems, reducing the risk of exploitation by cyber attackers.
These components collectively fortify defenses, mitigating the risk of cyber threats and ensuring a safe digital environment for your organization.
Navigate to the Protection + Module
Navigation: Policy > Protection+
Configure Your Policies
To begin enabling Premium Threat Protection, navigate to the body of the Protection+ security module under Policy. Once on Protecteciton+, you will see Premium Threat Protection header with the categories Virus, Spyware and Vulnerability listed underneath.
By default, each category under Premium Threat Protection policy will be set to "Alert" which does not block the threat but captures and records the log. Changing to "Block" drops the threat and records the log. Premium Threat Protection logs can be found in threat logs under Insights (Insights > Logs > Threat) regardless of the policy action.
Be aware, if you do not have the "Premium" version of Dynamic Defense, Premium Threat Protection options will be greyed out and not avaliable. You will also see an upgrade icon next to Premium Threat Protection.

After these block and alert decisions have been decided for each threat profile in your policy change, you can now proceed to Step 3.