How to Create a Web Filtering Policy
The Web Filtering feature involves classifying websites into predefined categories such as Social Networking, Gambling, Adult Content, and more. By categorizing websites, organizations can selectively allow or block access to specific categories based on their policies.
In addition to category-based web filtering, users can utilize allow and block lists for specific URL exceptions.
These approaches help enhance security, productivity, and compliance by controlling network access to online content, ensuring a safer and more efficient web browsing experience.
To Create a Web Filtering policy, follow the below steps:
Navigate to Web Filtering
Navigation: Policy > Web Filtering

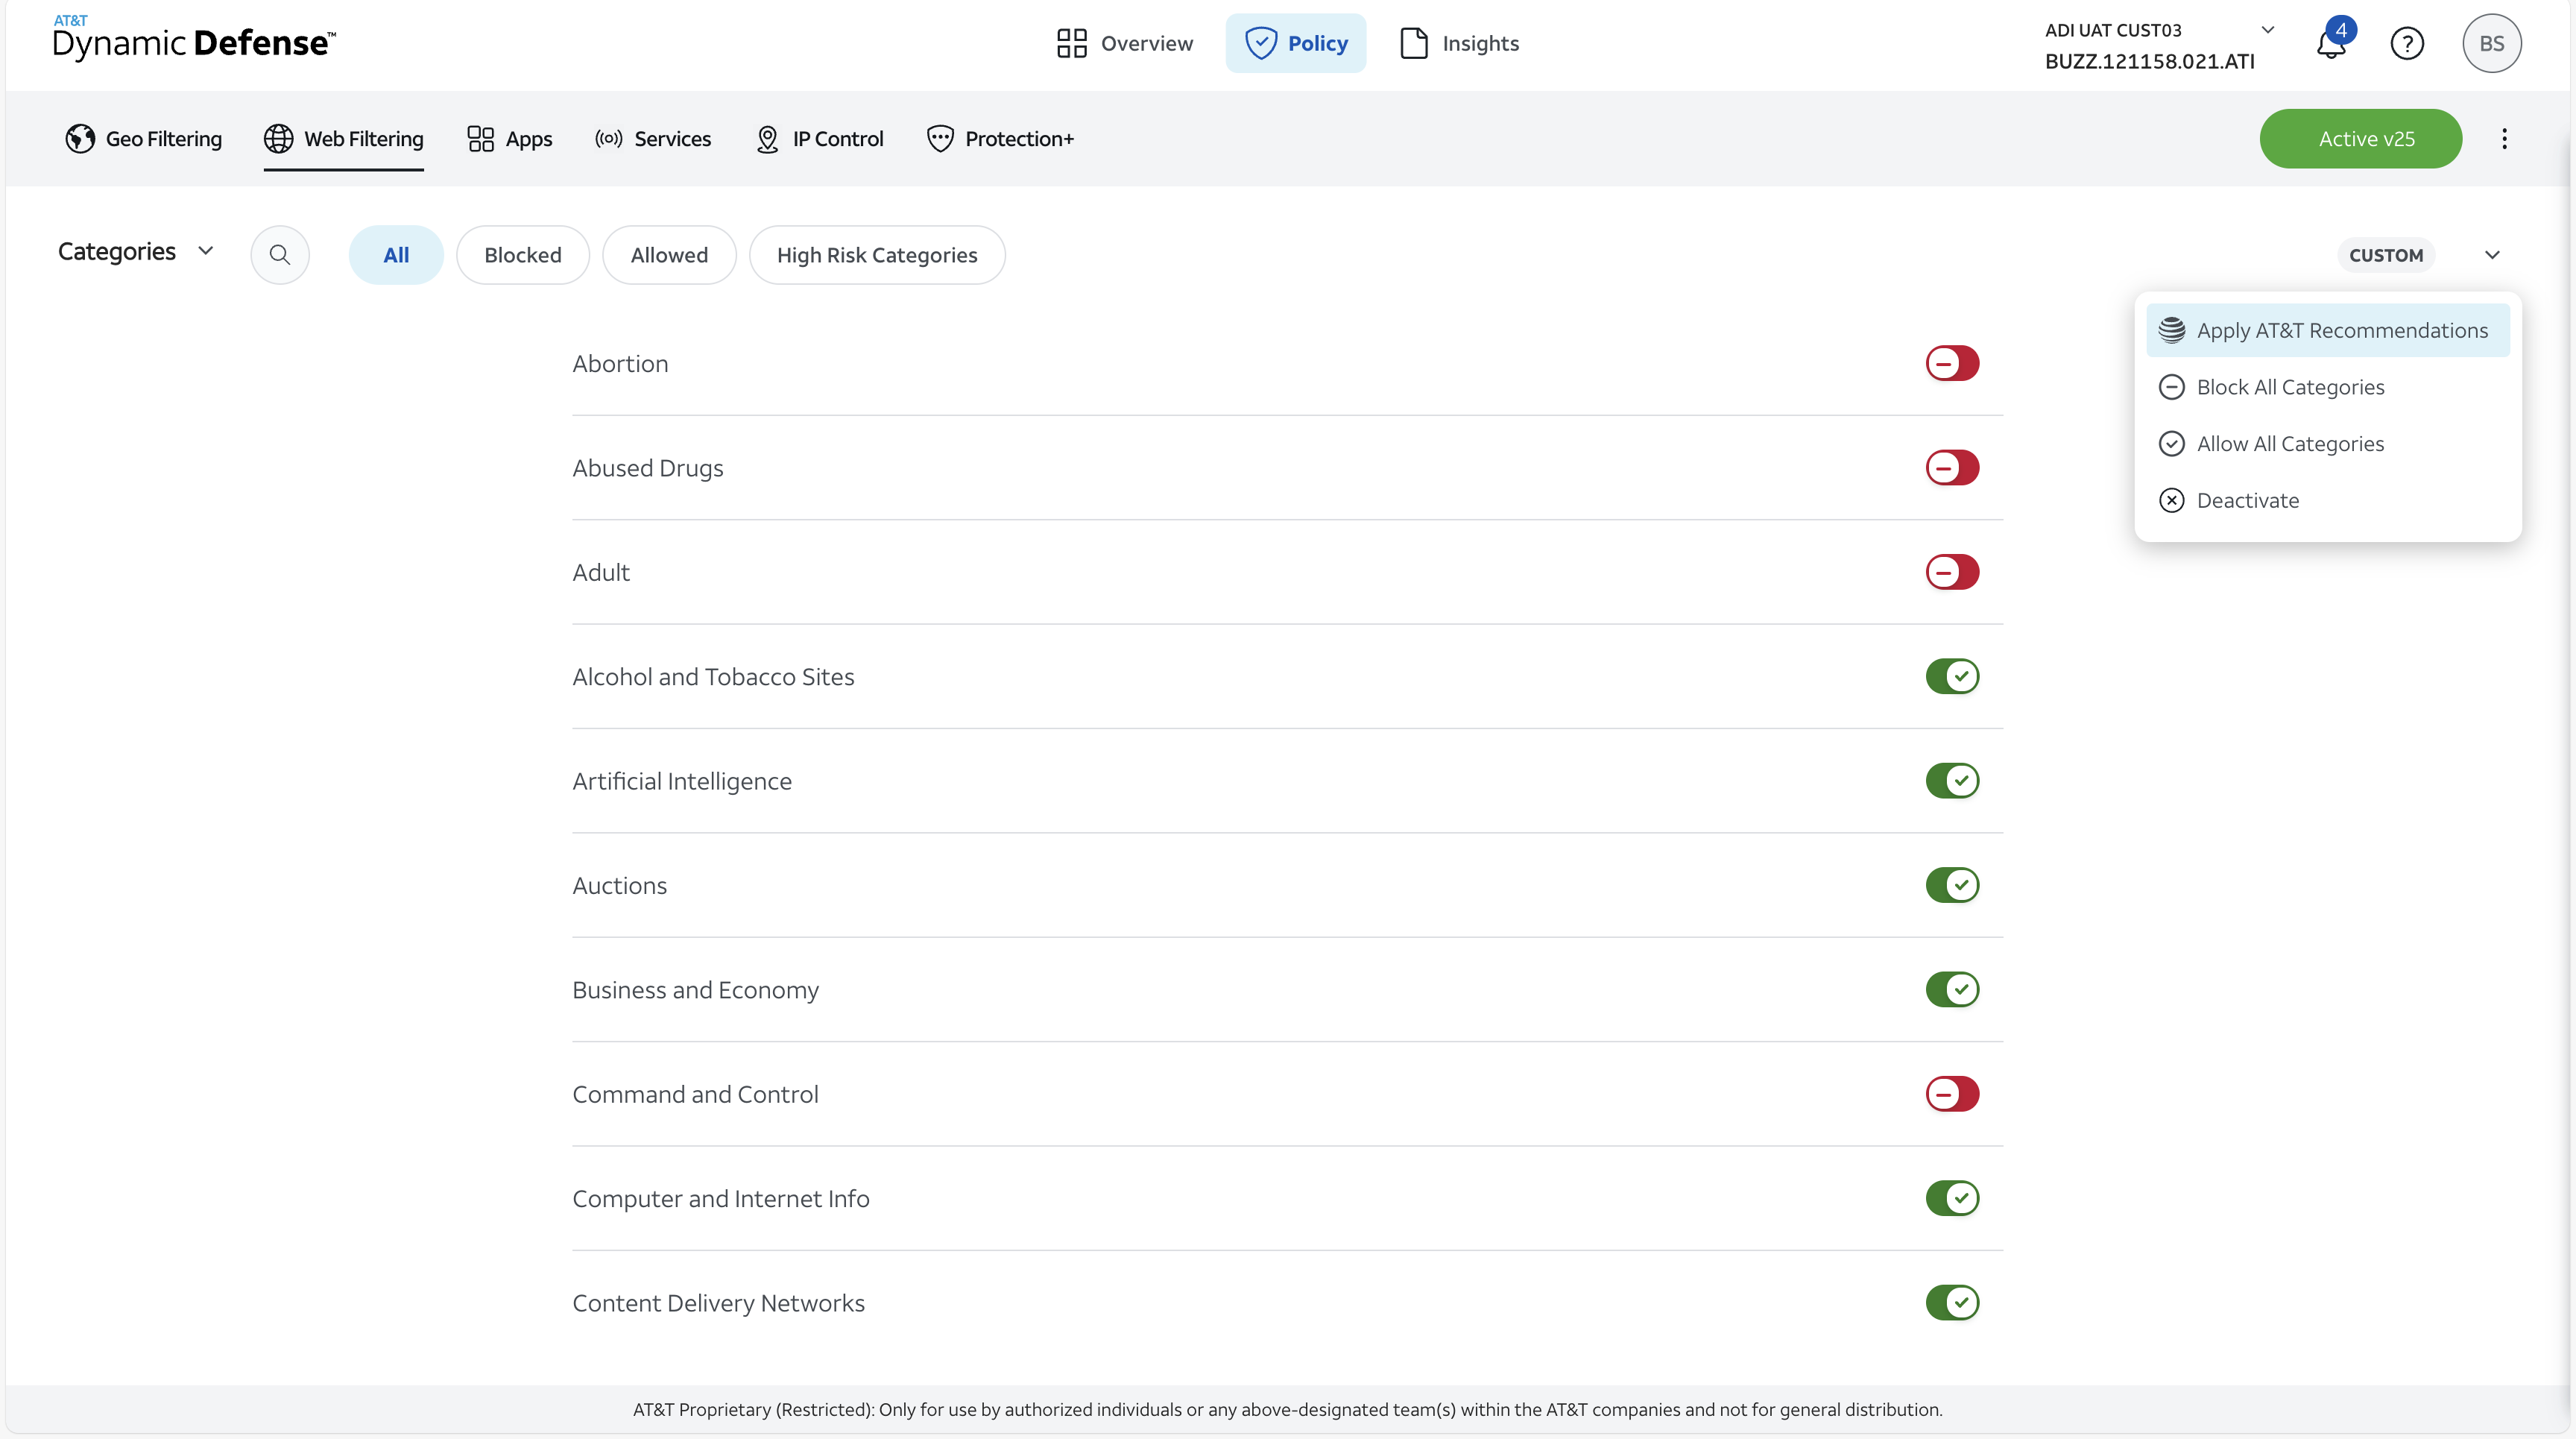
Configure Your Policies
To begin blocking or allowing access to content based on geolocation, navigate to the body of the Web Filtering Security Module shown above.
Once here, search for the specific web filtering category in which you would like to block or allow access to.
Example 1:
Let's assume you would like to Block your users form accessing Adult content on the internet.
You would do this simply by selecting the Red Minus = Block for "Adult" in the web filtering security module.

Example 2:
Let's assume you would like to Allow your users to access News content on the internet.
You would do this simply by selecting the Green Check = Allow for "News" in the web filtering security module.
After these block and allow decisions have been decided for each Web Category in your policy change, you can now proceed to Step 3.

If you are not sure which Web Filtering Categories you would like to block, please consider the following:
AT&T Recommended Web Filtering Policy:
By selecting to utilize the AT&T Recommended policy for Web Filtering, content will be blocked for the following categories:
- Abused Drugs
- Adult
- Command and Control
- Compromised Website
- Gambling
- Grayware
- Hacking
- High Risk
- Malware
- Newly Registered Domain
- Phishing
- Questionable
- Ransomware
- Real-Time-Detection
- Scanning Activity
- Weapons
The AT&T Recommended Policy can be turned on in the Dynamic Defense Portal's Geo Filtering page by clicking the down arrow on the right-hand side of the page.